Running your own VPN server gives you full privacy control, lets you bypass geo-restrictions, and secures your traffic on public Wi-Fi - without trusting a third-party VPN provider. This guide uses WireGuard, the fastest and easiest modern VPN protocol. For an exit node that isn't tied to your identity, run it on an anonymous VPS paid in crypto.
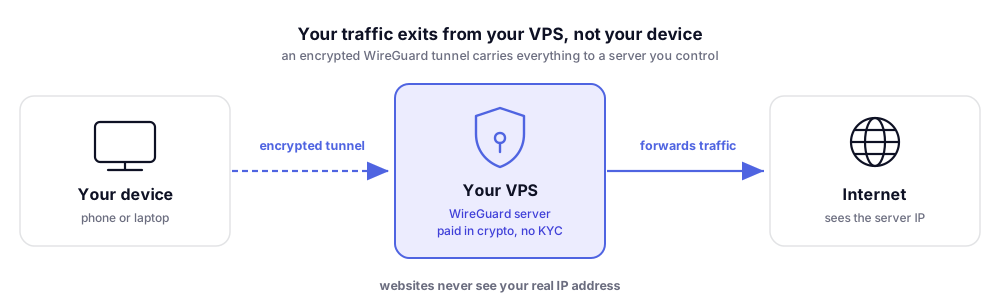
Why Use Your Own VPN?
A WireGuard VPS is simply a VPS running the WireGuard protocol - a private, self-hosted VPN endpoint you fully control. The upside:
- No logs - you control all data
- No monthly VPN subscription fees
- Pick any server location worldwide
- Secure all your devices (phone, laptop, tablet)
Prerequisites
- A VPS running Ubuntu 22.04 (see vps prices). Deploy your first VPS with bithost.
- SSH access to the server
- A client device (phone, laptop) to connect from
Step 1: Install WireGuard
apt update
apt install wireguard -y
Step 2: Generate Server Keys
wg genkey | tee /etc/wireguard/server_private.key | wg pubkey > /etc/wireguard/server_public.key
chmod 600 /etc/wireguard/server_private.key
View your keys:
cat /etc/wireguard/server_private.key
cat /etc/wireguard/server_public.key
Step 3: Generate Client Keys
wg genkey | tee /etc/wireguard/client_private.key | wg pubkey > /etc/wireguard/client_public.key
Step 4: Create the Server Config
Find your network interface name:
ip route | grep default
# Look for something like: default via x.x.x.x dev eth0
Create the config file (replace eth0 with your interface name, and
paste your actual keys):
nano /etc/wireguard/wg0.conf
[Interface]
PrivateKey = YOUR_SERVER_PRIVATE_KEY
Address = 10.0.0.1/24
ListenPort = 51820
PostUp = iptables -A FORWARD -i wg0 -j ACCEPT; iptables -t nat -A POSTROUTING -o eth0 -j MASQUERADE
PostDown = iptables -D FORWARD -i wg0 -j ACCEPT; iptables -t nat -D POSTROUTING -o eth0 -j MASQUERADE

[Peer]
PublicKey = YOUR_CLIENT_PUBLIC_KEY
AllowedIPs = 10.0.0.2/32
Step 5: Enable IP Forwarding
echo "net.ipv4.ip_forward=1" >> /etc/sysctl.conf
sysctl -p
Step 6: Open the Firewall Port
ufw allow 51820/udp
Step 7: Start WireGuard
systemctl enable wg-quick@wg0
systemctl start wg-quick@wg0
wg show
Step 8: Configure the Client
On Linux / macOS
Install WireGuard, then create a config file at
~/.config/wireguard/wg0.conf or /etc/wireguard/wg0.conf:
[Interface]
PrivateKey = YOUR_CLIENT_PRIVATE_KEY
Address = 10.0.0.2/24
DNS = 1.1.1.1

[Peer]
PublicKey = YOUR_SERVER_PUBLIC_KEY
Endpoint = YOUR_SERVER_IP:51820
AllowedIPs = 0.0.0.0/0
PersistentKeepalive = 25
Connect:
wg-quick up wg0
On Windows / Android / iOS
- Install the WireGuard app
- Create a new tunnel and paste the client config above
- Tap/click Activate
Verify It's Working
Visit https://whatismyip.com - it should now show your server's IP address, not your local one.
Questions? Email us at [email protected] - we reply in under 2 hours, 7 days a week.