SSH (Secure Shell) is the standard way to access and manage your Linux cloud server remotely. This guide covers everything from generating your SSH key to logging in for the first time.
What Is SSH?
SSH is an encrypted protocol that lets you control your server from your computer's terminal (command line). Think of it as a secure remote control for your server.
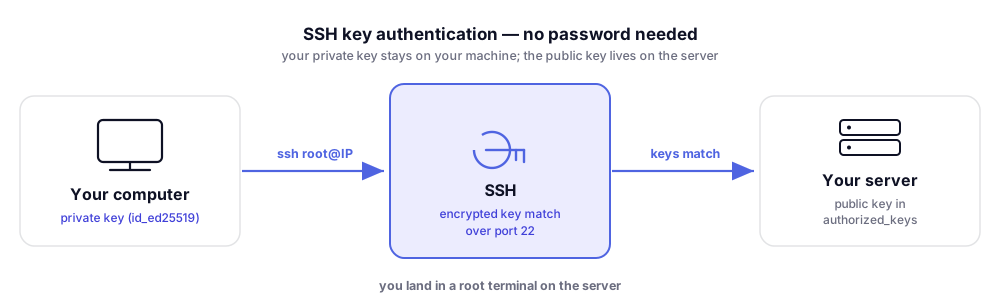
Part 1: Generate an SSH Key (Recommended)
SSH keys are more secure than passwords. For a deeper walkthrough, see the SSH keys guide. If you already have one, skip to Part 2.
On macOS / Linux
Open your terminal and run:
ssh-keygen -t ed25519 -C "[email protected]"
- Press Enter to accept the default file location
(
~/.ssh/id_ed25519) - Optionally set a passphrase for extra security
Your keys are saved at:
- Private key:
~/.ssh/id_ed25519- keep this secret, never share it - Public key:
~/.ssh/id_ed25519.pub- this is what you give to your server
To view your public key:
cat ~/.ssh/id_ed25519.pub
Copy the output - it starts with ssh-ed25519 AAAA...
On Windows
Option A: Windows Terminal / PowerShell (Windows 10/11)
ssh-keygen -t ed25519 -C "[email protected]"
Follow the same steps as above. Keys are saved in
C:\Users\YourName\.ssh\.
Option B: PuTTY
- Download PuTTYgen
- Select EdDSA and click Generate
- Move your mouse to generate randomness
- Save your private key (
.ppkfile) - Copy the public key from the text box at the top
Part 2: Add Your Public Key to the Server
When creating your server, paste your public key into the SSH Key field in your control panel. This is the recommended approach.
If your server is already running, add the key manually:
# On the server (logged in as root via password)
mkdir -p ~/.ssh
echo "YOUR_PUBLIC_KEY_HERE" >> ~/.ssh/authorized_keys
chmod 700 ~/.ssh
chmod 600 ~/.ssh/authorized_keys
Part 3: Connect to Your Server
macOS / Linux / Windows Terminal
ssh root@YOUR_SERVER_IP
Replace YOUR_SERVER_IP with your server's IPv4 address (e.g.
123.45.67.89).
If you used a non-default key file:
ssh -i ~/.ssh/id_ed25519 root@YOUR_SERVER_IP
Windows with PuTTY
- Open PuTTY
- Enter your server's IP in Host Name
- Go to Connection → SSH → Auth and browse to your
.ppkprivate key file - Click Open
Part 4: First-Time Connection
On your first connection, you'll see a message like:
The authenticity of host '123.45.67.89' can't be established.
Are you sure you want to continue connecting? (yes/no)
Type yes and press Enter. This adds your server to your list of known
hosts.
Useful SSH Tips
Create a Shortcut (SSH Config)
Edit or create ~/.ssh/config on your local machine:
Host myserver
  HostName 123.45.67.89
  User root
  IdentityFile ~/.ssh/id_ed25519
Now you can connect with just:
ssh myserver
Copy Files to/from the Server (SCP)
# Upload a file to the server
scp localfile.txt root@YOUR_SERVER_IP:/home/

# Download a file from the server
scp root@YOUR_SERVER_IP:/home/file.txt ./
Keep Sessions Alive
Add this to your ~/.ssh/config to prevent timeouts:
Host *
  ServerAliveInterval 60
Troubleshooting
| Problem | Solution |
|---|---|
Connection refused |
Server may still be booting - wait 1–2 min and retry |
Permission denied (publickey) |
Wrong key or key not added to server - check ~/.ssh/authorized_keys |
Host key verification failed |
Run ssh-keygen -R YOUR_SERVER_IP to clear old entry |
| Timeout / no response | Check your server's firewall - port 22 must be open |
Questions? Email us at [email protected] - we reply in under 2 hours, 7 days a week.